For something that looks very impressive and feels welcome on an episode of The Great British Bake Off, making a mirror glaze is actually not all that difficult, no matter what some people might say.
There are a few potential pitfalls, but my recipe is straightforward and only uses a handful of ingredients (none of which are condensed milk or corn syrup). It can be made in under 30 minutes and it can also be made well in advance (it freezes incredibly well).
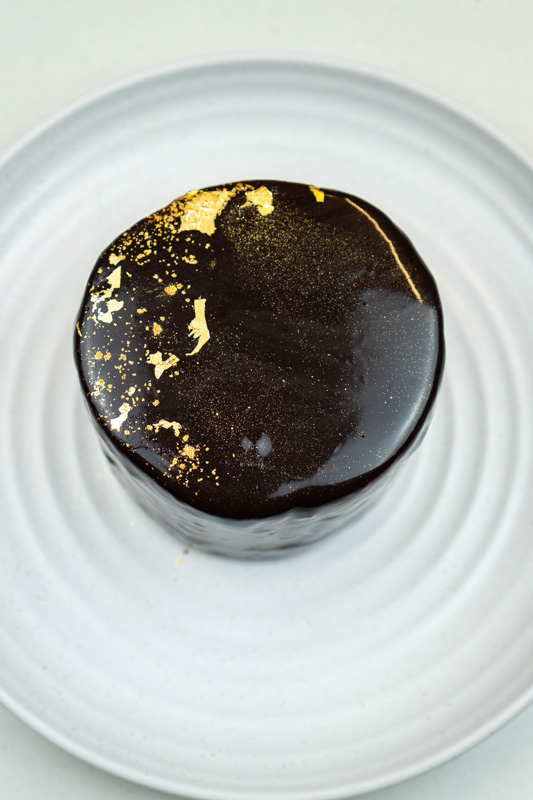
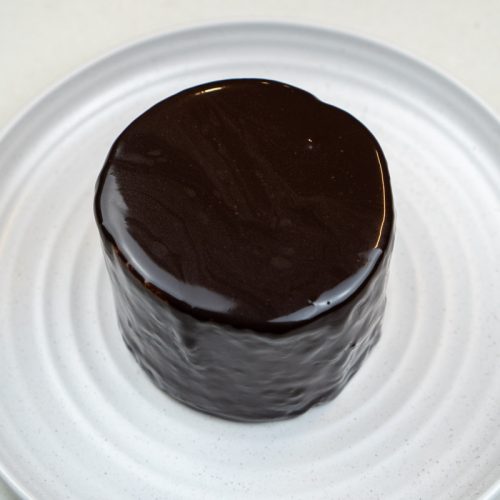
And when it’s done, it can make your cakes and desserts look absolutely beautiful – like something from a professional bakery!
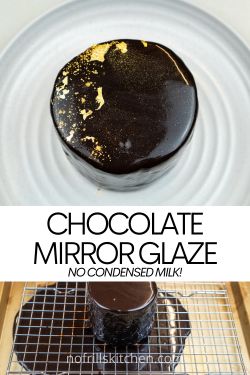
How to Make a Mirror Glaze Without Using Condensed Milk
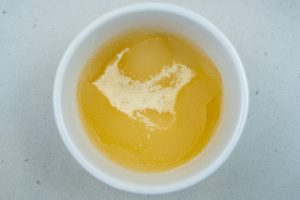
Gelatin is what gives a mirror glaze its glossy finish and characteristic set, so the first step is to hydrate the gelatin – which is a step I do in recipes like my raspberry and chocolate mousse and homemade marshmallows.
All you need to do is add some cool water to a small dish and sprinkle the gelatin over it. Let the gelatine hydrate for at least 5 minutes – in the meantime, you can get the rest of the glaze together.

To do this, add some cocoa powder to a small saucepan and pour over a bit of boiling water. I like using boiling water for a couple of reasons – for one, it is easier to mix into the cocoa powder, which can be hydrophobic.
And another is that the boiling water allows the flavour of the cocoa to really come out.
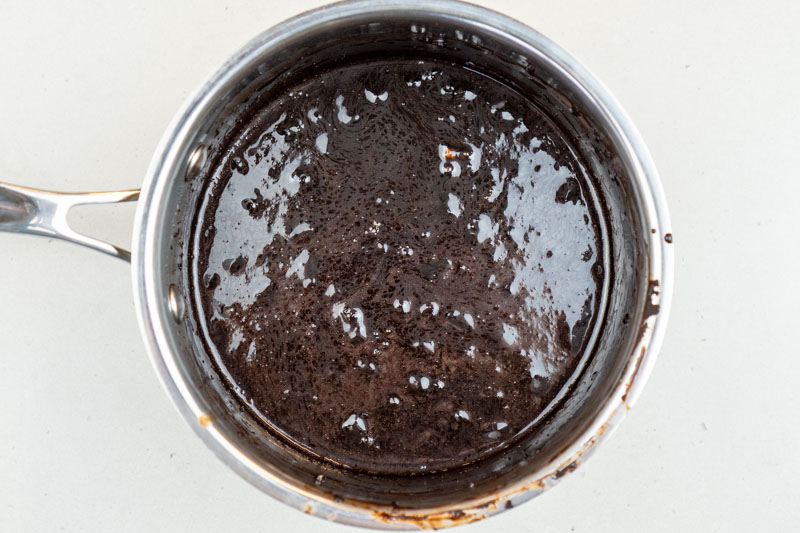
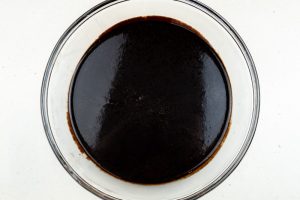
Mix the water into the cocoa powder until it’s fully hydrated and resembles a thick paste. Then, add in some cream and a bit of sugar and move it to the stovetop.

Stir constantly, pressing with the back of the spoon to break up lumps as best you can, and slowly bring the mixture to a boil.
Resist the temptation to whisk as you really don’t want to incorporate too much air into the glaze – this can result in not having a smooth glaze when you finish.
As soon as the mixture comes to a boil, remove it from the heat. Add the bloomed gelatin (it will likely come out in a big puck) and stir it in until its fully melted. Then, strain out any solids in the glaze through a fine mesh sieve.
Give the bowl a few vigorous taps or swirl it firmly on the bench top in order to bring any air bubbles to the surface.
Press a piece of plastic wrap directly on the surface of the glaze and allow it to cool to a temperature of 30°C/86°F – this will take a couple of hours.
Alternatively, you can refrigerate it for a couple of weeks or freeze it for a couple of months. Just reheat it to the same temperature – I like to put it in the microwave for 20-30 second bursts, stirring between each burst.

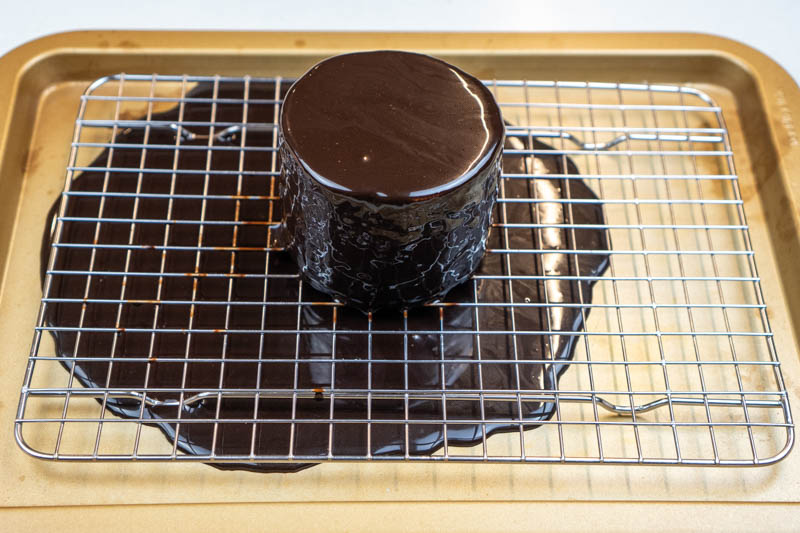
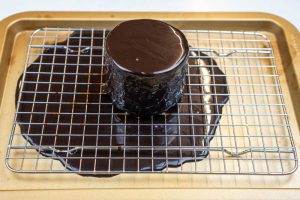
When you’re ready to use the glaze, set a wire rack on top of a clean rimmed baking sheet. Put your dessert on top of the rack and move the glaze to a jug or something with a pour spout.
Working quickly and confidently, pour the glaze over the dessert. Allow the excess glaze to collect in the baking tray – it can be reused if there aren’t any crumbs or debris in it!
Let the glaze set on the dessert for about 30 minutes in the fridge before you serve or decorate further.
Chocolate Mirror Glaze without Condensed Milk
Ingredients
- 10 g (2 ½ tsp) powdered gelatin
- 100 g (1 cup) Dutch process cocoa powder
- 120 ml (½ cup) boiling water
- 120 ml (½ cup) cream
- 200 g (1 cup) sugar
Instructions
- Add 60ml (¼ cup) cold water to a small bowl. From a height, sprinkle the gelatin over the water, ensuring that it's evenly distributed throughout. Allow to sit and rehydrate for at least 5 minutes.

- Meanwhile, add the cocoa powder to a small saucepan. Pour over the boiling water and stir until combined and it resembles a paste – do not use a whisk as this will incorporate unwanted air.
- Pour over the cream and sugar, stir to combine and set over medium heat. Stirring constantly yet gently to avoid incorporating any air bubbles, bring the mixture up to a boil. As soon as it starts to boil, remove the pan from the heat. Add the hydrated gelatin and stir until melted.
- Set a fine mesh sieve over a medium bowl and pour the glaze through the sieve, discarding any solid bits. Place a kitchen town on the bench top and firmly tap the bowl a few times on the towel – this will bring any air bubbles to the surface. Press a piece of plastic directly on the top of the glaze and allow to cool until the glaze reaches 30°C/86°F (see note 2).
- Transfer the glaze to a measuring jug (or something with a pour spout). Place the cake or dessert you desire to glaze (see note 3) on a wire rack set over a rimmed baking sheet. Working quickly in one fluid motion, evenly pour the glaze over the dessert, allowing the excess to drip off and collect in the baking tray (see note 4). Let the dessert set for at least 30 minutes before serving.


Notes
- This recipe yields about 500ml (2 cups) of glaze, which is enough to glaze roughly 2 20cm (8in) layer cakes.
- At this point, the glaze can be transferred to an airtight container and refrigerated for up to 2 weeks or frozen for up to 2 months. When ready to use, let it come to room temperature and gently heat it in 20-second bursts on 50% power in the microwave until it reaches 30°C/86°F. Proceed with the remaining steps.
- For the best results, ensure that the surface of the dessert you are glazing is completely smooth. If you’re glazing a frozen mousse cake or dessert, pour the glaze as soon as you remove it from the freezer to avoid any condensation from gathering on the surface of the cake.
- Excess glaze – provided it is free of crumbs and debris – can be collected from the tray, melted again and reused.
Nutrition
Disclaimer: Nutritional information is automatically generated and provided as guidance only. Accuracy is not guaranteed.
And that’s all there is to making a gorgeous, glossy chocolate mirror glaze! There’s no need for condensed milk to get beautiful, impressive results.
Do you want to make a beautiful mirror glaze? Have any questions? Let me know in the comments!